
Loading...

Let our Amazon experts show you how to leverage the power of ZonGuru to smash your sales goals. You’re invited to a 15-minute Rocket Demo so you can see the ZonGuru tools first-hand.
Book your seat now!
After publishing this update in our ZonGuru weekly newsletter, we decided to dive deeper into helping sellers set up a Google Merchant account.
Google Shopping used to only consist of paid listings. However, due to the COVID-19 pandemic, merchants can now list their products on Google for free. This means free exposure to millions of people who visit Google every day for their shopping needs. If you already run shopping ads on Google, this is a great way to supplement your paid advertising with free listings.
Amazon sellers can leverage this opportunity to list products on Google to gain more exposure and grow their private label business even further. Keep in mind that you need to have a website (i.e. Shopify, WooCommerce, BigCommerce) in order to create a Google Merchant account and fulfill orders.

Before you proceed to create your Google Merchant account, you first need to follow the checklist to make sure you meet all of the Google Merchant Center requirements as shown below:
Once you have reviewed these requirements, the next step is to register and create your account on Google Merchant Center. Below is a simple step-by-step set of instructions to create your account.
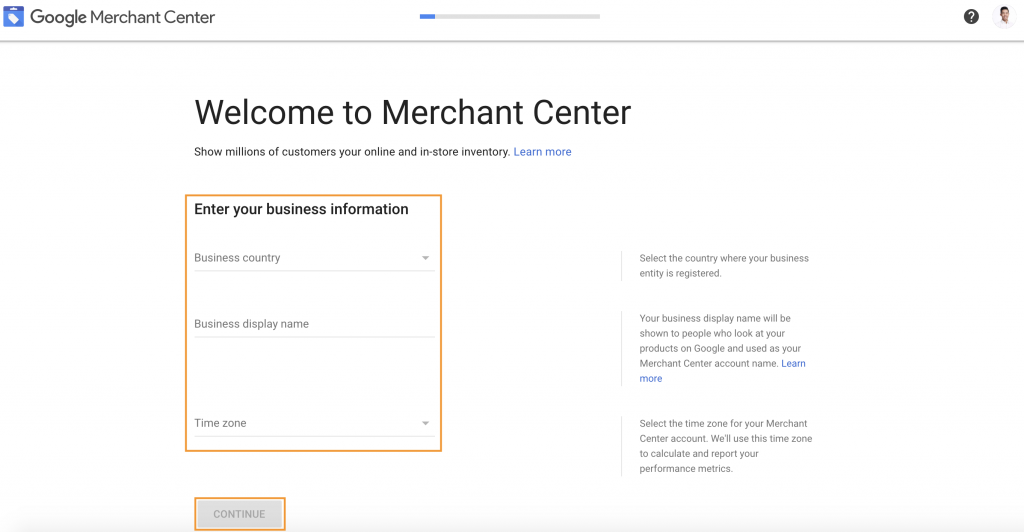
First and foremost, you need to enter the following information regarding your business:
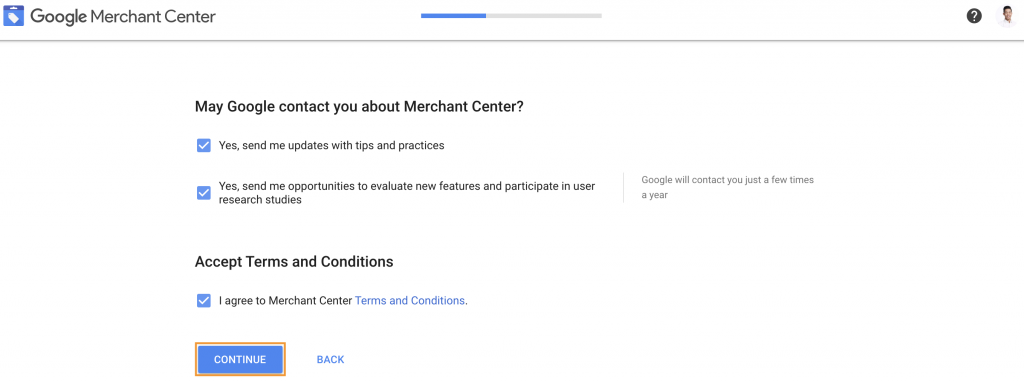
Once you have entered your business information, proceed to read and accept the Terms and Conditions as shown in the image below. You can also check the checkboxes if you want to receive updates with tips and practices from Google. It is highly recommended you do so, so you receive the latest news to optimize and improve your business.
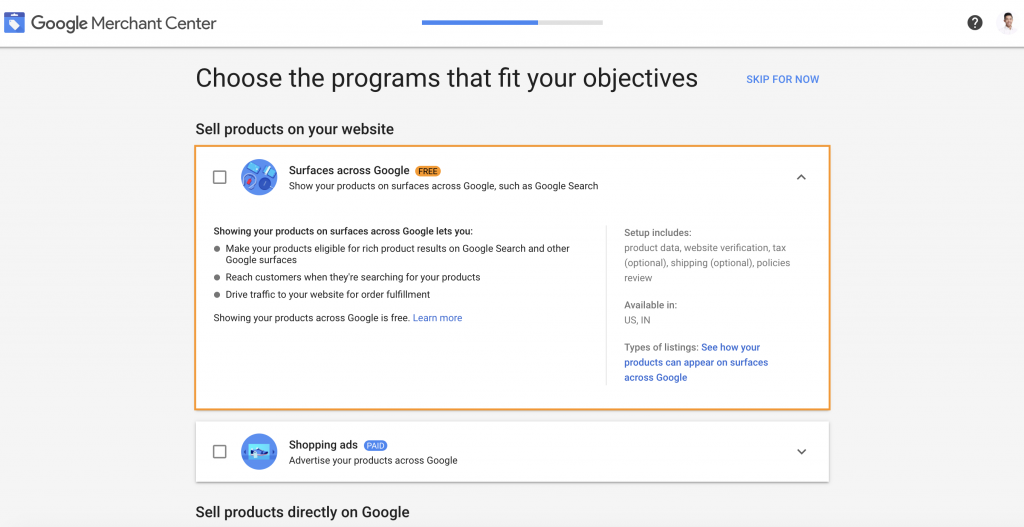
The next step is to choose a program that fits your objectives. In this case, choose the first one, “Surface across Google.” This program showcases your products on surfaces across Google search as shown in the image below.
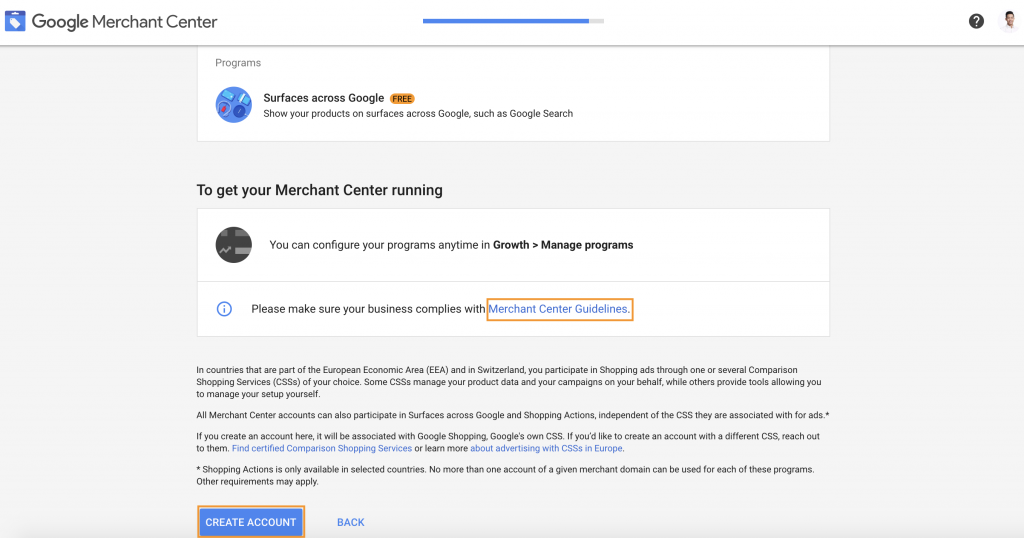
Keep in mind to always double-check and review your account details. Click the “Create Account” button to finish the process.
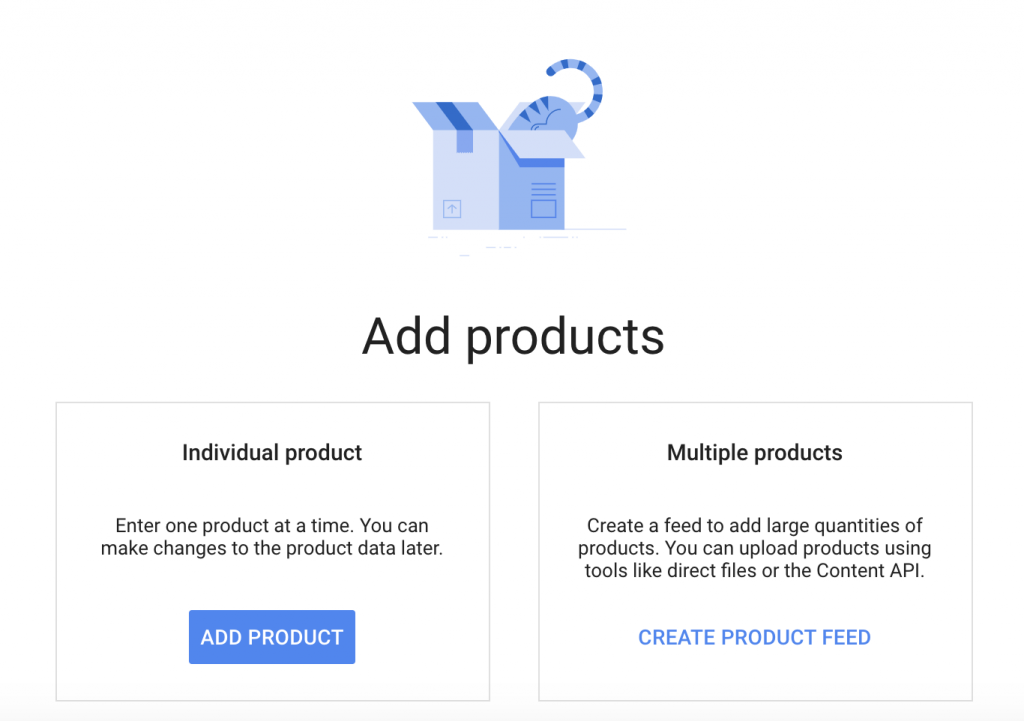
You can’t make any sales with an empty store, right? Once your Google Merchant account is created, it’s time to add products to your store. You have 2 options to add products. The first is to add one product at a time. The second is to bulk add multiple products at once.
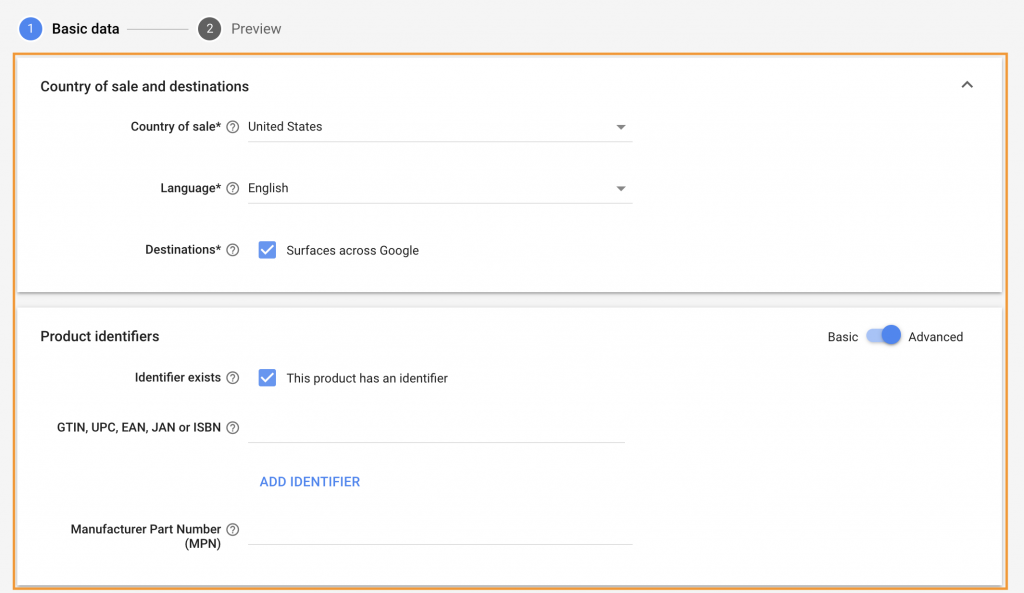
For now, the country of sale is set to “United States.” Google plans to expand this globally by the end of the year. Similar to how you add products on Amazon, you must include the UPC, EAN, or any recognized barcode that you use for your products.
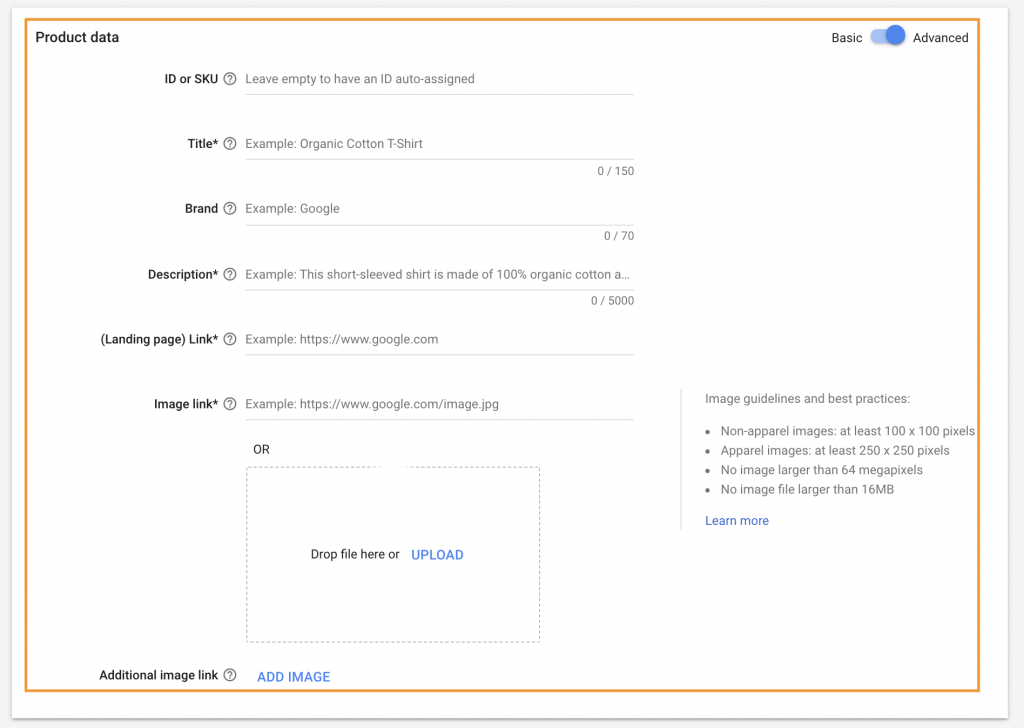
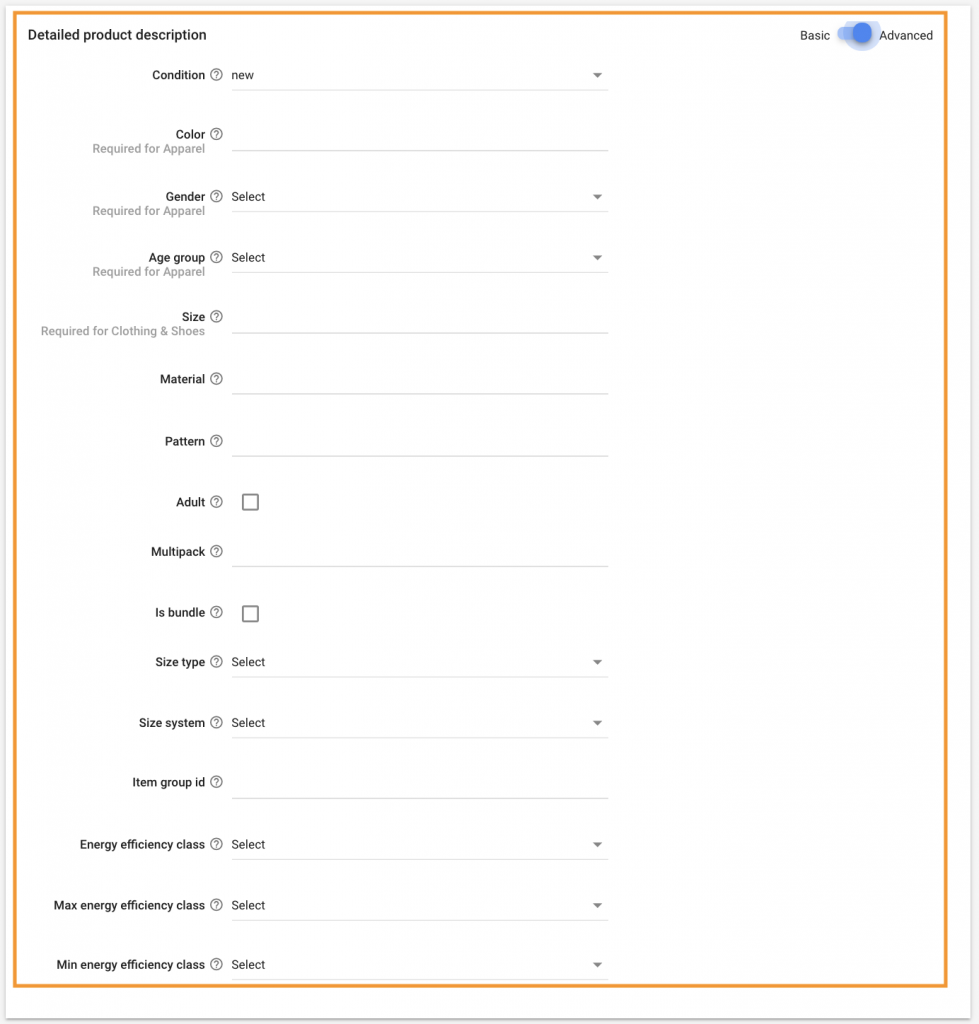
Pro Tip: Turn on the Advanced option to add more specific product details.
You also must add a product title, description, brand, product link, and image link (or upload your product images) to your listing. Be sure to follow Google’s requirements when adding product information. For instance, image sizes vary according to apparel images (at least 250 x 250 pixels) and non-apparel images (at least 100 x 100 pixels).
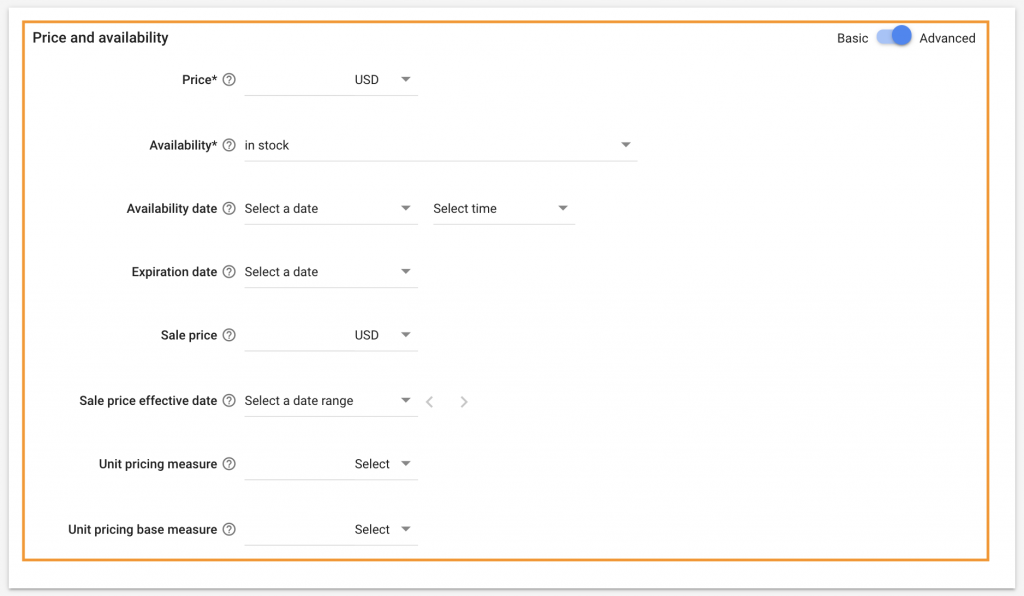
You are required to add your selling price, product availability, availability date, and all other relevant pricing details.
Detailed product descriptions such as the color, size, material, and other attributes must be added as well. For instance, if you sell laptop sleeves, make sure to add the type of material the sleeve is made of in order to help shoppers make better purchasing decisions. The more information provided, the better.
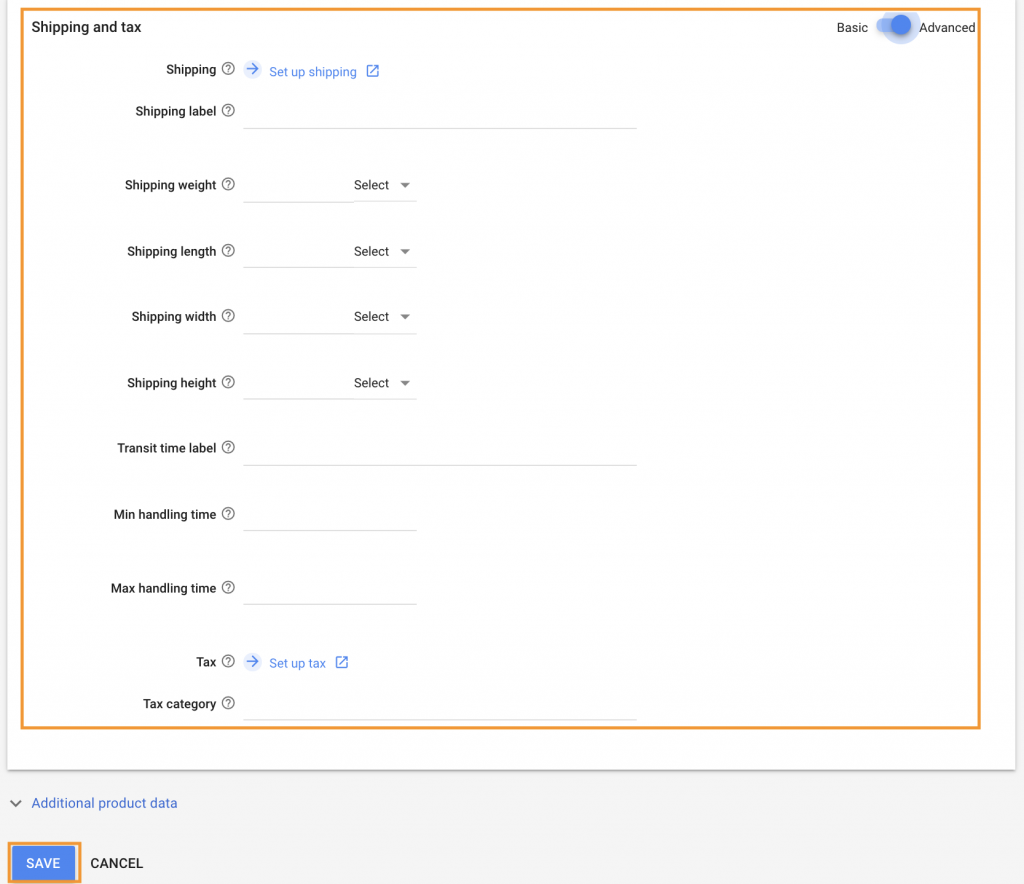
Don’t forget to include shipping and tax details, should you have any. Once you have completed all the relevant product details, click the “Save” button and wait for Google’s approval. Once your products are approved, they will appear in relevant Google search results.
There are a few steps you can take to optimize your product listings in the Google Shopping tab and improve discovery. Make sure that your product title attributes for each product feed are descriptive. Shoppers generally ignore vague titles. Refer to this help article for product title guidelines.
Consider keywords your customers would search for on Google to find your product, and incorporate them naturally into your product title and description. Use Google Keyword Planner to do your keyword research on Google. Similarly, remember to use ZonGuru’s Keywords on Fire to find the best keywords that will get you more sales on Amazon.
You can learn more on how to optimize your Amazon backend keywords in 2021 by reading our blog post HERE. Be sure to watch our video on how to optimize your keywords to rank and convert on Amazon HERE, as well!
Due to COVID-19, shoppers are turning to eCommerce to meet their needs. It is important that sellers take into consideration other selling resources besides Amazon. Listing your products outside of Amazon allows you to expand and grow your brand further by reaching millions of shoppers on Google.
If you need any help with optimizing your listings using our Amazon online tool suite, do not hesitate to reach out to our amazing support team.
Discover opportunities. Maximize your sales. Grow your Amazon business!
Get started with ZonGuru, access all the tools with a FREE trial.
.png) Start FREE Trial
Start FREE Trial
Discover your true sales potential in 2024. Try our statistically-proven methods!
 See If You Qualify
Tools that you can start using now for FREE. No sign up required.
 Free Tools


